Scents & Colors
How to Layer and Top Soap for a Beautiful Bar
Learn soap layering and tops for cold process bars: timing your pours, decorating with swirls and peaks, and choosing colorants that stay true after cure.
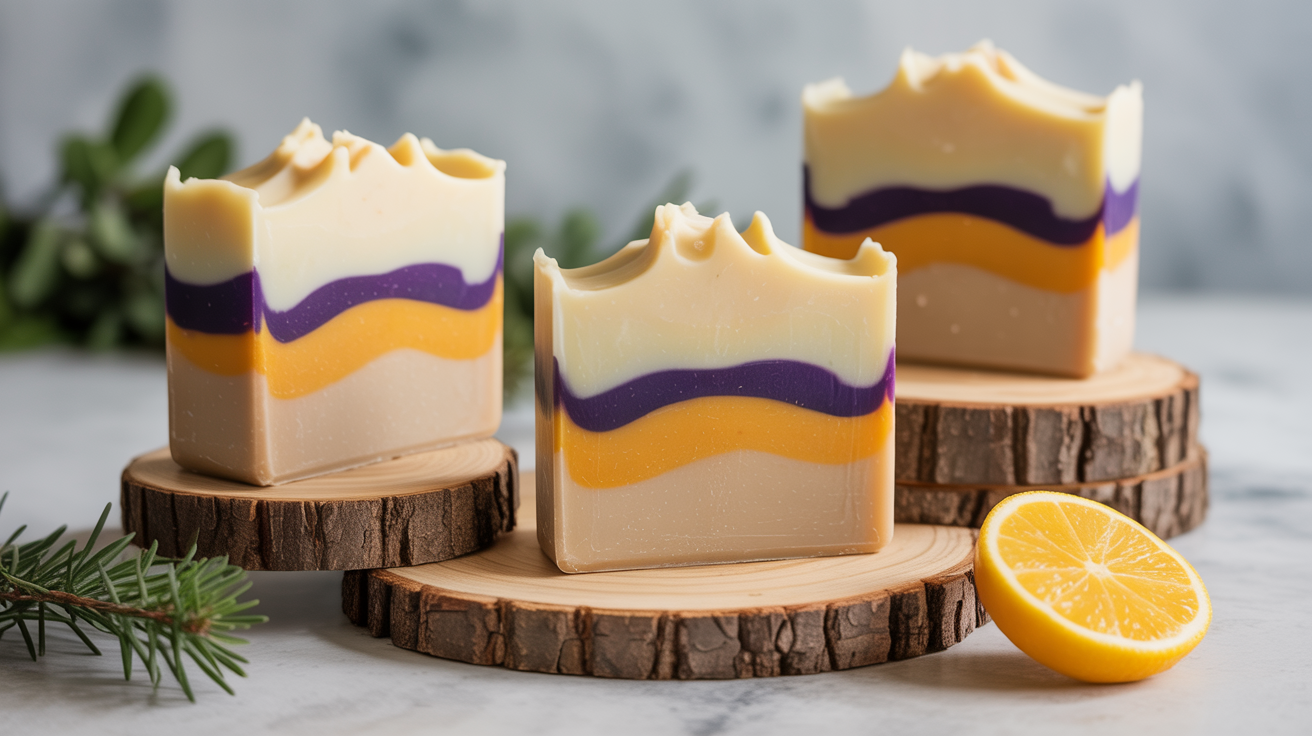
Layered and decorated soaps are what turn a functional bar into something people want to keep on the counter rather than tuck under the sink. The technique is not as complicated as finished photos suggest, but timing matters a great deal. Get the pours right and your layers will be crisp; rush them or let the batter sit too long and you end up with merged colors or a sunken seam.
This guide walks through how layers work in cold process soap, how to time each pour for clean results, and what you can do with the top of the bar once it is in the mold. As always: wear goggles and chemical-resistant gloves whenever you handle lye or raw batter, work in a ventilated space away from children and pets, and add lye crystals to water, never the other way around. Run your recipe through a lye calculator before you start.
How Layers Work in Cold Process Soap
A layered bar is made by pouring two or more batches of soap batter into the same mold at different times. Each layer is a distinct color (or a distinct shade of the same color), and the line between them is visible when you cut the bar.
There are two main approaches:
Dividing one batch: You mix a single recipe, split the batter into two or more containers at light trace, color each portion separately, then pour them one at a time. Because they come from the same batch they will behave identically, which makes timing easier.
Making separate batches: You mix and pour the first batch, let it set until firm enough to hold a second pour, then make a fresh batch and pour it on top. This gives the cleanest separation but requires planning, because you are essentially soaping twice in one session.
The dividing method is better for beginners. You only work with one set of lye, one pot of oils, and one batch of fragrance. The separate-batch method is worth learning once you are comfortable with timing.
Timing Your Pours for Clean Lines
This is where most first-time layered soaps go wrong. Pour the second layer too soon and it sinks into the first. Wait too long and the layers do not bond at all and will split apart when you cut the bar.
For the dividing method: Pour your first colored portion into the mold right after you add color at light trace. Work quickly with the second portion. A thin, room-temperature pour (around 90 to 100 F / 32 to 38 C) will land gently on the first layer without disturbing it. You do not need to wait for the first layer to set. As long as both portions are at a similar fluid consistency, the pour happens almost immediately and the layers fuse during gel phase.
For the separate-batch method: The first layer needs to be firm enough to resist a finger pressed lightly into the surface, but not so hard that it is pulling away from the mold sides. This usually takes two to four hours depending on your recipe and room temperature. A high-coconut recipe sets faster; a high-olive recipe can stay soft for eight hours or more. Check the surface every thirty minutes once you hit the two-hour mark.
When you pour the second batch on top, tilt the mold slightly and pour down the side so the batter flows across the surface rather than dropping straight down. Pouring through a spatula held just above the first layer also breaks the fall.
| Layer approach | When to pour second layer | Typical wait time |
|---|---|---|
| Dividing one batch | Immediately after coloring first portion | 0 to 5 minutes |
| Separate batches, fast-tracing recipe | Surface is firm to the touch | 2 to 3 hours |
| Separate batches, slow-tracing recipe (high olive) | Surface is firm to the touch | 4 to 8 hours |
Decorating the Top of Your Soap
The top of the bar is the first thing people see, so it is worth spending a few minutes on it before you put the mold aside to cure.
Textured peaks: Use a spoon, spatula, or silicone brush to pull the batter into soft peaks. You can go tall and dramatic or keep them low and even. A stiff trace works best here; thin batter will settle flat within an hour.
Swirled tops: Pour your remaining batter in a thin stream over the surface in loops, figure eights, or parallel lines. Then drag a skewer or chopstick through the pattern to create swirls. Keep the skewer close to the surface so it pulls through the top layer only without dragging up the layer beneath.
Poured designs: Reserve a small amount of a contrasting color and pour it in a thin stream in a zigzag or spiral pattern. This creates a distinct pattern that cuts through to reveal the stripe when the bar is sliced.
Embedded lines: Pour a small amount of a contrasting batch flat into the mold first, let it firm up for fifteen to twenty minutes until just set, then pour your main batter on top. When cut, each bar will show a thin colored stripe running through the middle.
For any top decoration, a soap that has been brought to a medium trace (thicker than heavy cream but not as stiff as pudding) holds detail best. Very thin batter self-levels and loses patterns quickly.
Colorants and Additives That Work in Layers
The colorant you use affects whether layers stay distinct or bleed into each other. A few things to know:
Micas are the most reliable colorant for crisp layers. They disperse easily in a small amount of oil before you add them to batter, they stay put once the soap sets, and they do not typically bleed during cure. For a two-layer bar, a pearl or metallic mica on the top layer against a matte mid-tone on the bottom looks clean.
Oxides (iron oxides and ultramarines) are also stable and will not bleed. They are more opaque than micas, which creates strong color blocks. They can be used for a dark bottom layer paired with a light top layer without bleeding upward.
Natural colorants (clays, herbs, spices) can migrate over time during cure, especially in a high-water recipe or one that goes through a heavy gel phase. If a clean line matters to you, learn more about how to color soap naturally before choosing plant-based options for a layered bar.
Activated charcoal makes a striking dark layer paired with a cream or white. Use about one teaspoon per pound of oils (approximately 2.2 grams per 454 grams of oils). It will not bleed but it will turn the whole bar black if you stir too aggressively at the seam.
Keep your colorant usage consistent across layers within one batch. If you use two percent mica by weight of oils in the bottom layer and five percent in the top, the top layer will trace faster and you may get uneven pour timing.
If you are adding fragrance and it accelerates trace, your window for a clean pour shrinks considerably. A fragrance that behaves well in soap makes layering much easier. You can read about choosing between fragrance oils and essential oils and how they perform at trace, and separately about how much fragrance to add to soap so you have a reliable starting point before you experiment with decoration.
Frequently Asked Questions
Will my layers separate when I cut the bars?
They can if the layers did not bond during saponification. This usually happens when the first layer was too hard and fully cured before the second pour. A waxy, fully set surface will not fuse with new batter. If you are using the separate-batch method, aim for firm but not fully cured, and score the surface gently with a fork before the second pour to give the layers something to grip.
My bottom layer looks muddy where it meets the top layer. What happened?
The two batches mixed slightly at the seam. Either the second pour was too warm and fluid, the pour height was too high, or the first layer was not firm enough. Try lowering the temperature of the second pour to around 90 F (32 C) and pouring more slowly down the side of the mold.
Can I do more than two layers?
Yes, though the more layers you add, the more precise your timing needs to be. Three to four layers in a single batch is manageable if you work quickly. More than that and the first portions may start to set unevenly while you are still working. A cooler room temperature (around 65 F / 18 C) slows trace and gives you more working time.
How long do I wait before cutting a layered bar?
The same as any cold process soap: at least 24 to 48 hours in the mold (longer for high-olive recipes), then unmold and cut. A bar that is too soft when cut will squish and the layers may blur at the edges. A bar that is too hard will crumble or crack at the seam. If the bar bends without cracking and the layers feel distinct to the touch, it is ready to cut.
Does the top decoration survive cure?
Peaks and swirls hold well through the cure period as long as you did not go through a heavy gel phase that caused the batter to slump. To keep tops from gelling and losing definition, put your freshly poured mold in the refrigerator or freezer for two hours, then move it to room temperature to finish saponification. The cold slows gel phase significantly, which preserves peak and swirl detail.