Scents & Colors
How to Make a Simple Soap Swirl
Learn how to swirl cold process soap like a pro. This beginner guide covers in-the-pot swirls, colorant prep, and tips for clean, repeatable results.
A swirl turns a plain bar into something people pick up first. The technique looks elaborate from the outside, but the actual steps are pretty approachable once you understand what trace means and why timing matters so much.
Swirling is a cold process technique that works because soap batter stays fluid long enough to fold colors through each other before saponification sets everything in place. The key is mixing to a light trace, working at a deliberate pace, and choosing a fragrance oil that does not rush you.
What You Need Before You Start
Every cold process batch begins with proper safety gear. Wear goggles and heat-resistant gloves from the moment you measure your lye. Mix lye into water (never water into lye), do it in a ventilated space, and keep children and pets out of the room while the lye water cools. Run your full recipe through a reputable lye calculator before you pour a single gram.
For the swirl itself you will need:
- A cold process soap recipe (400 to 500 g of oils is a manageable first batch)
- Two or three small cups or pourers for divided batter
- A chopstick, skewer, or thin spatula for the swirl motion
- Soap-safe colorants such as micas, oxides, or natural pigments
- A loaf mold or individual cavity mold
Measure and set out everything before you add lye to water. You will not have time to hunt for cups once the batch is moving.
How to Reach Light Trace for Swirling
Trace is the point where your soap batter has emulsified enough to leave a faint trail on the surface when you drizzle a bit from a spoon. Light trace looks like thin cake batter. Medium trace looks like pudding. You want light trace for swirling because the batter still flows freely.
To get there:
- Combine your melted oils and cooled lye water when both are between 90 and 110 F (32 to 43 C). Some soapers prefer both temps to match; others are comfortable with a 10-degree difference. Either approach can produce a clean result.
- Stick blend in short pulses of 3 to 5 seconds, then hand-stir for about 15 seconds. Alternate until the batter looks uniform and slightly thickened.
- Stop blending before the batter thickens further. Thin is better than thick when you plan to swirl.
Fragrance choice matters here. Some fragrance oils accelerate trace quickly, turning your batter dense and grainy before you have time to pour. Look for a fragrance rated "slow to accelerate" or "no acceleration" by your supplier. Essential oils can behave similarly, so check the usage notes on each one before you commit to a swirl batch. Our guide on fragrance oils vs essential oils in soap goes deeper on how each type performs in cold process, and how much fragrance to add to soap covers safe usage rates so you can plan your batch before you begin.
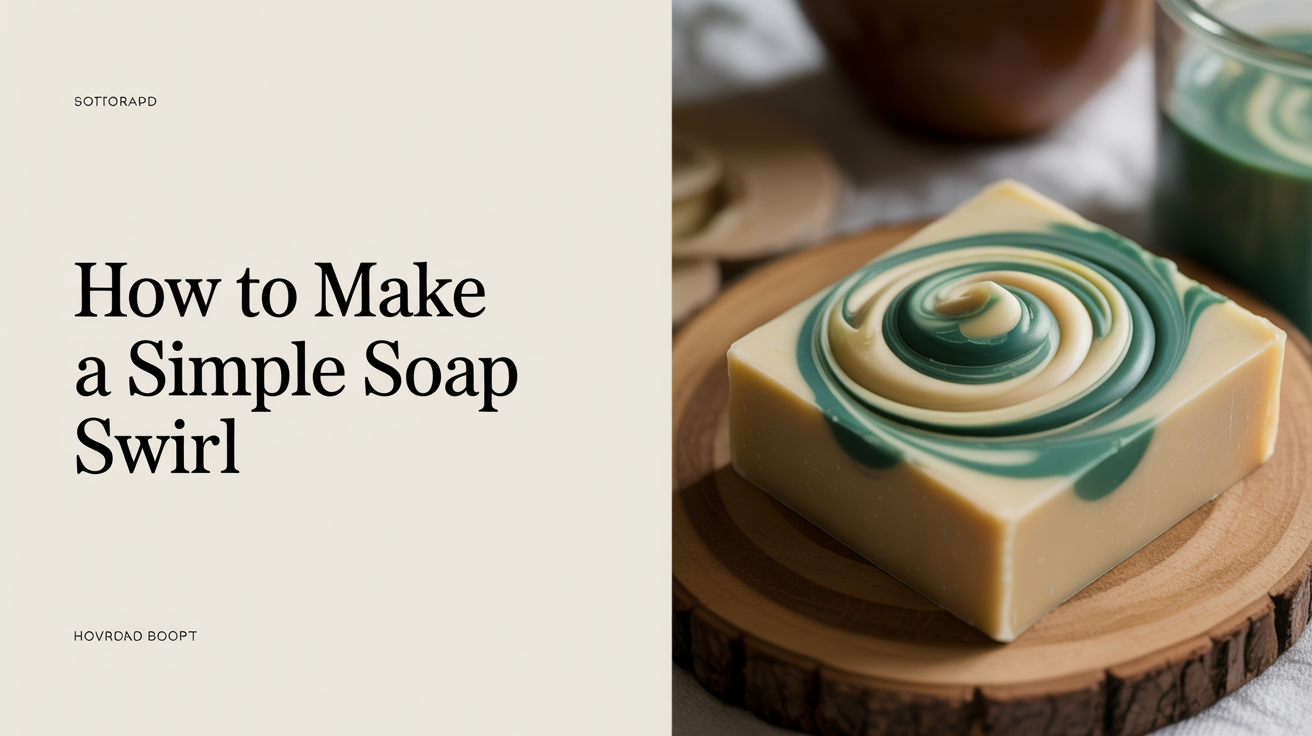
The In-the-Pot Swirl Method
The in-the-pot swirl is the most beginner-friendly cold process soap swirl technique. You do all the color work inside your mixing container before you pour anything into the mold.
- Bring your batter to light trace, then divide it. Pour roughly 70 percent back into the pot and split the remaining 30 percent between two or three small cups.
- Add your colorants to the small cups and stir each one until fully blended. A small whisk or a milk frother works well here.
- Pour each colored portion back into the main pot in a thin stream, zigzagging across the surface rather than dumping it all at once.
- Draw your skewer through the batter in a figure-eight, an S-shape, or a simple side-to-side pass. Two or three strokes is often enough. Over-mixing will blend the colors into a uniform muddy tone rather than a distinct swirl.
- Pour the entire batch into your mold in one slow, steady motion, keeping the pouring cup close to the mold so you do not disturb the pattern.
The colors will shift slightly as the soap heats during saponification, so expect the final cured bar to look a little different from what you saw in the pot. The full reveal comes when you cut.
Choosing and Preparing Your Colorants
Color type affects how clean the finished swirl looks. Micas are the most common choice because they are finely milled, soap-safe, and produce vibrant, blendable tones. Iron oxides (red, yellow, black) are stable and do not bleed between layers. Ultramarine blues and violets are another reliable option for beginners.
To prep each colorant:
- Start with about half a teaspoon of mica or oxide per 500 g of oils and adjust from there.
- Mix each colorant into a small amount of lightweight oil (sunflower or sweet almond work well) before adding it to your soap batter. This prevents dry clumps from forming in the finished bar.
- Add the slurry to the divided batter and stir thoroughly before pouring it back into the main pot.
Natural colorants like madder root powder, spirulina, and activated charcoal can also work, but their performance in cold process varies more than synthetic options. For a full look at what to expect, read our guide on how to color soap naturally.
One thing to leave out: candle dyes and food coloring. Candle dyes often bleed and migrate in cold process soap, and food coloring typically fades to brown within weeks of cure.
Cutting, Curing, and Testing Your Swirled Bars
The swirl pattern you create at pour is only part of the story. The real reveal comes when you cut.
Unmold your soap after 24 to 48 hours. If it still feels soft or sticky, wait another day before cutting. Cold process soap goes through gel phase, where the center heats and can look almost translucent before it cools and firms. This is normal and not a sign of a failed batch.
Cut with a single, confident stroke rather than a sawing motion. A soap cutter or a fine wire tool gives the cleanest slice and shows the swirl clearly on the cut face.
Cure the bars on a rack with good airflow for at least 4 to 6 weeks. During this time, water evaporates and any remaining saponification completes, leaving a harder and milder bar. Soap that looks finished at week one is not finished.
Before you use or share any bar, do a zap test: touch your tongue briefly to a corner of the bar. A tingle or zap sensation means the bar needs more cure time. No reaction means it is ready.
Frequently Asked Questions
Why did my swirl colors blend together into a muddy color instead of staying distinct?
Usually this comes from too many strokes with the skewer, or from batter that had already reached medium or heavy trace when you poured the colors in. Stick to two or three swirl motions and stop. Also confirm that each colorant was fully blended into its divided batter portion before you added it back to the pot.
Can I use essential oils instead of fragrance oils for a swirled batch?
Yes, but some essential oils accelerate trace fast. Clove, cinnamon, and spice blends are particularly aggressive and can leave almost no working time. Floral and citrus essential oils tend to be slower, though citrus scent often fades in cold process bars over time. Always check the behavior notes for your specific oil before planning a swirl batch around it.
How many colors should I use for a first swirl?
Two colors plus the uncolored base is a solid starting point. Three total gives a readable swirl without the visual noise that comes from too many shades competing for space. Add more once the mechanics feel comfortable.
My soap looked great in the mold but the swirl barely showed in the cured bar. What went wrong?
The swirl may be present inside the bar even if the top surface does not show much. Cut a test slice from one end to check. If the swirl is genuinely faint throughout, the colorants may have been too similar in tone, or the batter was mixed a bit too long after adding the colors, which can start to blend them before you reach the mold.
Do I need a special mold to make swirls?
No. A standard loaf mold works well and gives you a long slice with each cut, which shows the swirl pattern consistently from bar to bar. Cavity molds show a top-surface swirl rather than a cross-section view, which is a different look but also worth trying once you have the basics down.