Getting Started
How to Make Soap at Home: A Complete Beginner's Guide
Learn how to make soap at home with this calm, practical guide for beginners. Covers melt-and-pour, cold process, lye safety, supplies, and curing.
Learning how to make soap at home is more approachable than most people expect. Yes, lye is involved in real soap, and yes, it deserves respect, but with the right information and a calm setup, beginners make beautiful, safe batches on their first try every single day. This guide walks you through two methods, the supplies you actually need, how to handle lye without anxiety, and what to expect from your first loaf.
Two Methods Worth Knowing
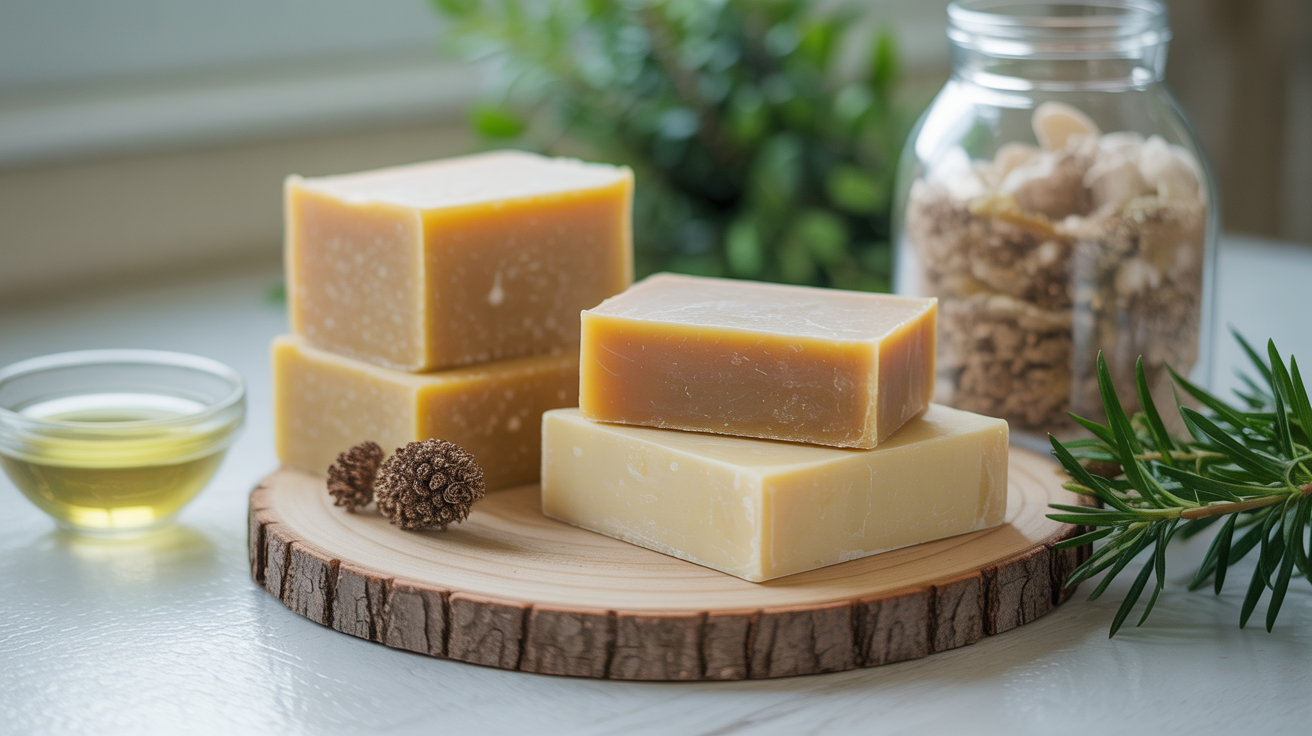
Homemade soap is made one of two ways: melt-and-pour, or cold process. They produce very different experiences, so it helps to understand both before you pick up any supplies.
Melt-and-pour uses a pre-made soap base (glycerin, shea, or goat milk are common) that you buy in blocks. You melt it, add color and fragrance, pour it into a mold, and it hardens within hours. No lye handling, no cure time, usable same day. It's a genuinely satisfying craft project and a smart first step for anyone who wants to ease in slowly.
Cold process is real soap-from-scratch. You combine oils with a lye solution, let the mixture reach a state called "trace," pour it into a mold, and let it cure for four to six weeks. The finished bar is fully custom, your oils, your scent, your lather. Lye is consumed in the chemical reaction (saponification), so the finished bar contains no active lye at all, provided the recipe is balanced.
For a deeper look at how these methods compare, see The Different Methods of Making Soap Explained.
Which Method Should You Start With?
If lye makes you nervous, start with melt-and-pour. There is no wrong answer here. Melt-and-pour lets you practice the tactile side of soap making, working with molds, measuring fragrance, swirling colors, without any chemistry involved. Many experienced soap makers still use it for novelty shapes or gift sets.
If you are comfortable following safety instructions carefully and want to make soap from scratch, cold process is absolutely doable on your first try. The key is using a trusted recipe and running it through a lye calculator before you start. More on that shortly.
Supplies for Soap Making for Beginners
You do not need much to get started. The list below covers cold process; melt-and-pour only requires the base, fragrance, colorant, and a mold.
| Item | Notes |
|---|---|
| Kitchen scale | Digital, reads to 0.1 g; weight measurements only, no volume measuring |
| Two heat-safe pitchers | Glass or stainless steel; one for lye solution, one for oils |
| Stick blender | Speeds emulsification; a regular blender will not work |
| Silicone loaf mold | 1 lb or 2 lb; easy unmolding |
| Thermometer | Infrared or probe; helps match oil and lye temps |
| Safety goggles | Rated chemical splash; non-negotiable |
| Nitrile gloves | Elbow-length preferred; lye will burn skin quickly |
| Long-sleeved shirt | Cover arms while mixing |
| Sodium hydroxide (lye) | Food-grade or 100% pure NaOH; hardware-store lye often has additives |
| Base oils | A beginner-friendly trio: olive oil, coconut oil, castor oil |
| Fragrance or essential oil | Soap-safe; cosmetic fragrance oils are reliable |
| Colorant (optional) | Micas or oxides; soap-safe |
| White vinegar nearby | Neutralizes lye spills on surfaces (not on skin, flush skin with water) |
For a more complete breakdown with quantities and sourcing tips, check Soap Making Supplies Every Beginner Needs.
Lye Safety: What You Need to Know
Lye (sodium hydroxide, NaOH) is caustic. It will burn skin and eyes on contact. That sounds alarming, but the actual risk management is straightforward: gear up, work carefully, and know what to do if something splashes.
Before you start:
- Put on goggles and gloves. Do this before you open the lye container.
- Work in a ventilated area. Mixing lye into water releases fumes for about 60 seconds. Open a window, turn on a fan, or work outside.
- Keep children and pets out of the workspace.
- Have a bowl of water nearby for skin contact, and paper towels for surface spills.
Mixing lye into water: Always add lye TO water, never water to lye. Pour the measured lye crystals slowly into the measured water while stirring. The solution will heat up dramatically, to around 200°F (93°C), and may steam briefly. This is normal. Set it somewhere stable (a trivet or a heat-safe surface) and let it cool.
If lye touches skin: Flush immediately with cool running water for 15–20 minutes. Do not apply vinegar to skin, that's for countertop spills.
If it splashes in eyes: Flush with water for 20 minutes and seek medical attention.
Cold process soap made from a properly calculated recipe contains no active lye in the finished bar. The saponification process converts it fully. This is worth repeating because it surprises a lot of beginners.
Making Your First Batch: A Cold Process Overview
This is not a recipe with exact gram weights, for that you need a lye calculator, which will size the formula to your mold and oils. What follows is the sequence of steps so you know what to expect.
1. Choose and calculate your recipe. Pick a simple beginner recipe (olive oil 40%, coconut oil 40%, castor oil 5%, another liquid oil for the remainder is a classic starting point). Run it through SoapCalc or Brambleberry's lye calculator. The calculator tells you exactly how many grams of lye and water to use. Do not skip this step or eyeball it.
2. Prepare your workspace. Cover the counter. Set out all supplies. Put on goggles and gloves now, not mid-process.
3. Mix the lye solution. Measure your water into a heat-safe pitcher. Measure your lye in a separate container. Add the lye slowly to the water, stir until dissolved, and set aside to cool to around 90–110°F (32–43°C).
4. Melt and measure your oils. Gently melt coconut oil (it's solid at room temperature) and combine all oils in your second pitcher. They should reach a similar temperature to your lye solution, roughly 90–110°F (32–43°C). Matching temperatures helps produce a smooth batter.
5. Combine and blend to trace. Pour the lye solution into the oils slowly. Use the stick blender in short pulses, then stir. "Trace" means the mixture has thickened to roughly a pudding consistency, it leaves a faint trail on the surface when you drizzle a spoonful over it. Light trace is fine for most beginner pours.
6. Add fragrance and color. Stir in your fragrance oil at around 0.5–1 oz per pound of oils. Add colorant if using. Mix gently.
7. Pour into the mold. Pour the batter in, tap the mold gently to release air bubbles, and smooth the top with a spatula. Some soapers cover it with cardboard and a towel to insulate; others leave it uncovered. Both work.
8. Unmold and cut. After 24–48 hours, check firmness. If the soap feels hard and not sticky, unmold it. Cut it into bars with a bench scraper or sharp knife. If it's still soft, give it another day.
9. Cure. Arrange bars on a rack, not touching, in a spot with decent air circulation. Let them cure for four to six weeks. During this time, excess water evaporates and the bar hardens. Trying to use cold process soap before it's cured is safe but the bar will be soft and will dissolve fast in the shower.
The Curing Process Explained
Curing is not glamorous, but it matters. A freshly cut cold process bar is technically safe to use, the saponification is complete, but it still contains a lot of water (often 25–30% of its weight). As that water leaves during cure, the bar becomes harder, longer-lasting, and milder on skin.
Four weeks is the typical minimum. Six weeks gives a noticeably better bar. Some high-olive-oil soaps (called Castile soaps) benefit from six months or more.
Check bars occasionally. They should develop a slight white powder on the surface called soda ash, this is harmless and can be planed off or rinsed away before use. If you see any soft, wet-looking patches after a week, the soap may have gone through "partial gel" unevenly; it is still fine to use.
Melt-and-pour soap has no cure time. That is one of its genuine advantages.
Frequently Asked Questions
Is homemade soap really lye-free if the recipe uses lye?
Yes. Real soap requires a chemical reaction between oils and an alkali (sodium hydroxide for bar soap). The reaction, saponification, consumes the lye entirely. A properly calculated finished bar contains no active lye. Soap marketed as "lye-free" is either melt-and-pour (pre-saponified) or made with a premade base. It was still made with lye at some point in manufacturing.
How much does it cost to make soap at home?
A basic cold process batch costs roughly $10–20 in materials and yields 8–12 bars. That works out to well under $2 per bar. Startup costs for equipment (scale, blender, molds, safety gear) run $50–100 and are reusable indefinitely. For a full breakdown, see Is Making Soap at Home Worth It? Cost and Time.
Can I use any oils I have in the kitchen?
Technically yes, but the resulting bar may be soft, slimy, or quick to go rancid. Olive oil, coconut oil, and castor oil are popular because they each contribute something specific, lather, hardness, bubbles, and balance each other well. Canola and sunflower oils can work in small percentages. Always run any substitution through a lye calculator because different oils require different amounts of lye.
What if my soap seizes or gets thick too fast?
Some fragrance oils accelerate trace, turning your batter from liquid to thick mashed potato in seconds. If this happens, quickly pour what you can into the mold and push the rest in with a spatula. The soap will still be fine, it just won't have an artistic swirl on top. Research your fragrance supplier's usage notes before your first batch; most list whether a fragrance accelerates.
When is cold process soap safe to unmold?
Usually after 24–48 hours. If the soap is still soft or sticky at 48 hours, wait. Temperature and oil composition affect hardness, a high-olive-oil recipe takes longer to firm up than one with more coconut oil. If after 72 hours it still feels like soft cheese, check whether you used the correct lye calculation. Excess lye (a lye-heavy recipe) can cause a crumbly, brittle texture; a major oil excess can leave a soft, greasy bar.